


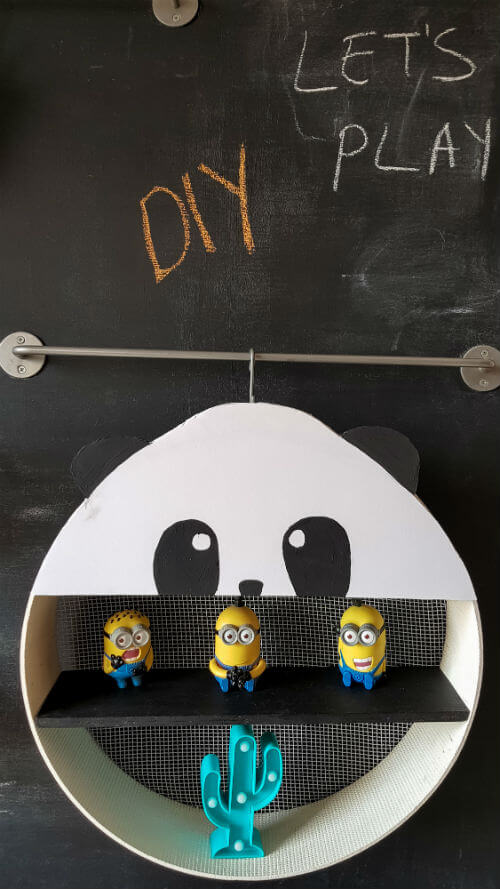
My famous sieve rack is now a panda rack. How do you think it looks? When my friends start to have babies, it was time to work. Since I have never needed anything like this, I have never thought about projects for baby and child room. But I am saving fun rack projects on Pinterest for some time now. When I saw round racks like Panda, things got clearer in my mind. I thought, “yes I can make sieve rack look like this one”. And I think I did it. Recently, I shared minimalist decoration examples for child room. And I needed a rack just like this that will fit child room perfectly.
Materials:
- Sieve
- Rack suitable for sieve
- 5 mm craft cardboard
- Black and white acrylic paint
I believe you all know how to make sieve rack so I will shortly explain steps. I bought these sieves from İzmir Kemeraltı and painted them to white. Since this project is for baby and child room, I selected water based acrylic paint in all paints. 2 layers of acrylic paint will work like magic. I recommend waiting for 1-2 hours between each layer.
After buying your sieve, you need to cut a rack just to fit the middle part. You can cut it from MDF. At this stage, a carpenter or a construction market will do the job.
Then, paint this rack with black acrylic paint. Again, after 2 layers of paint, it is time for protective layer. At this point, water based lacquer or wax will be the healthiest choice. I choose wax for this sieve and rack.
When this stage is completed, I was so impatient and shared black and white rack on Instagram. Minimalist lovers like me will like this look. This rack will perfectly fit summerhouses.
When it is time to make the panda, I first thought of craft cardboard. But, if you want complete wooden look, you can take the sieve to a carpenter. The carpenter can cut you a panda head from MDF 😉 And only thing you will do is just to paint.
Place craft cardboard on one side of the sieve and draw the outline. After making this circle look like ears, eyes, and nose of a panda, cut it out with craft knife. Draw eyes and nose with black acrylic paint and let it dry.
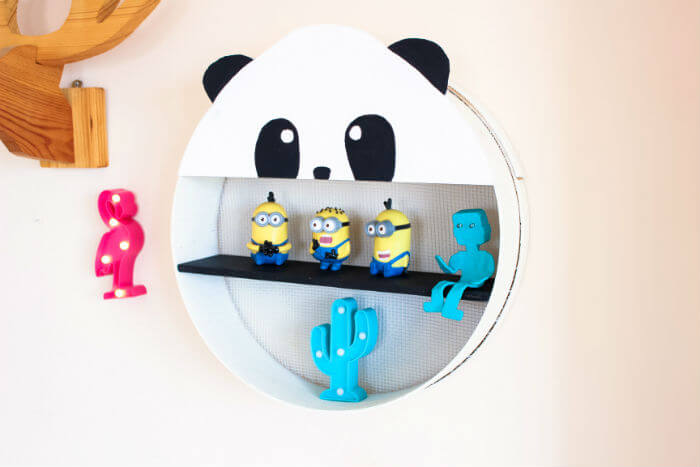
When you glue this piece on the area you marked with silicon, you panda rack will be ready.
Actually, I was really happy with the results. Also, you can create different ideas and characters with this project. Now it is all up to your imagination. See you in our next project 😉


